Change Staples
With Finisher
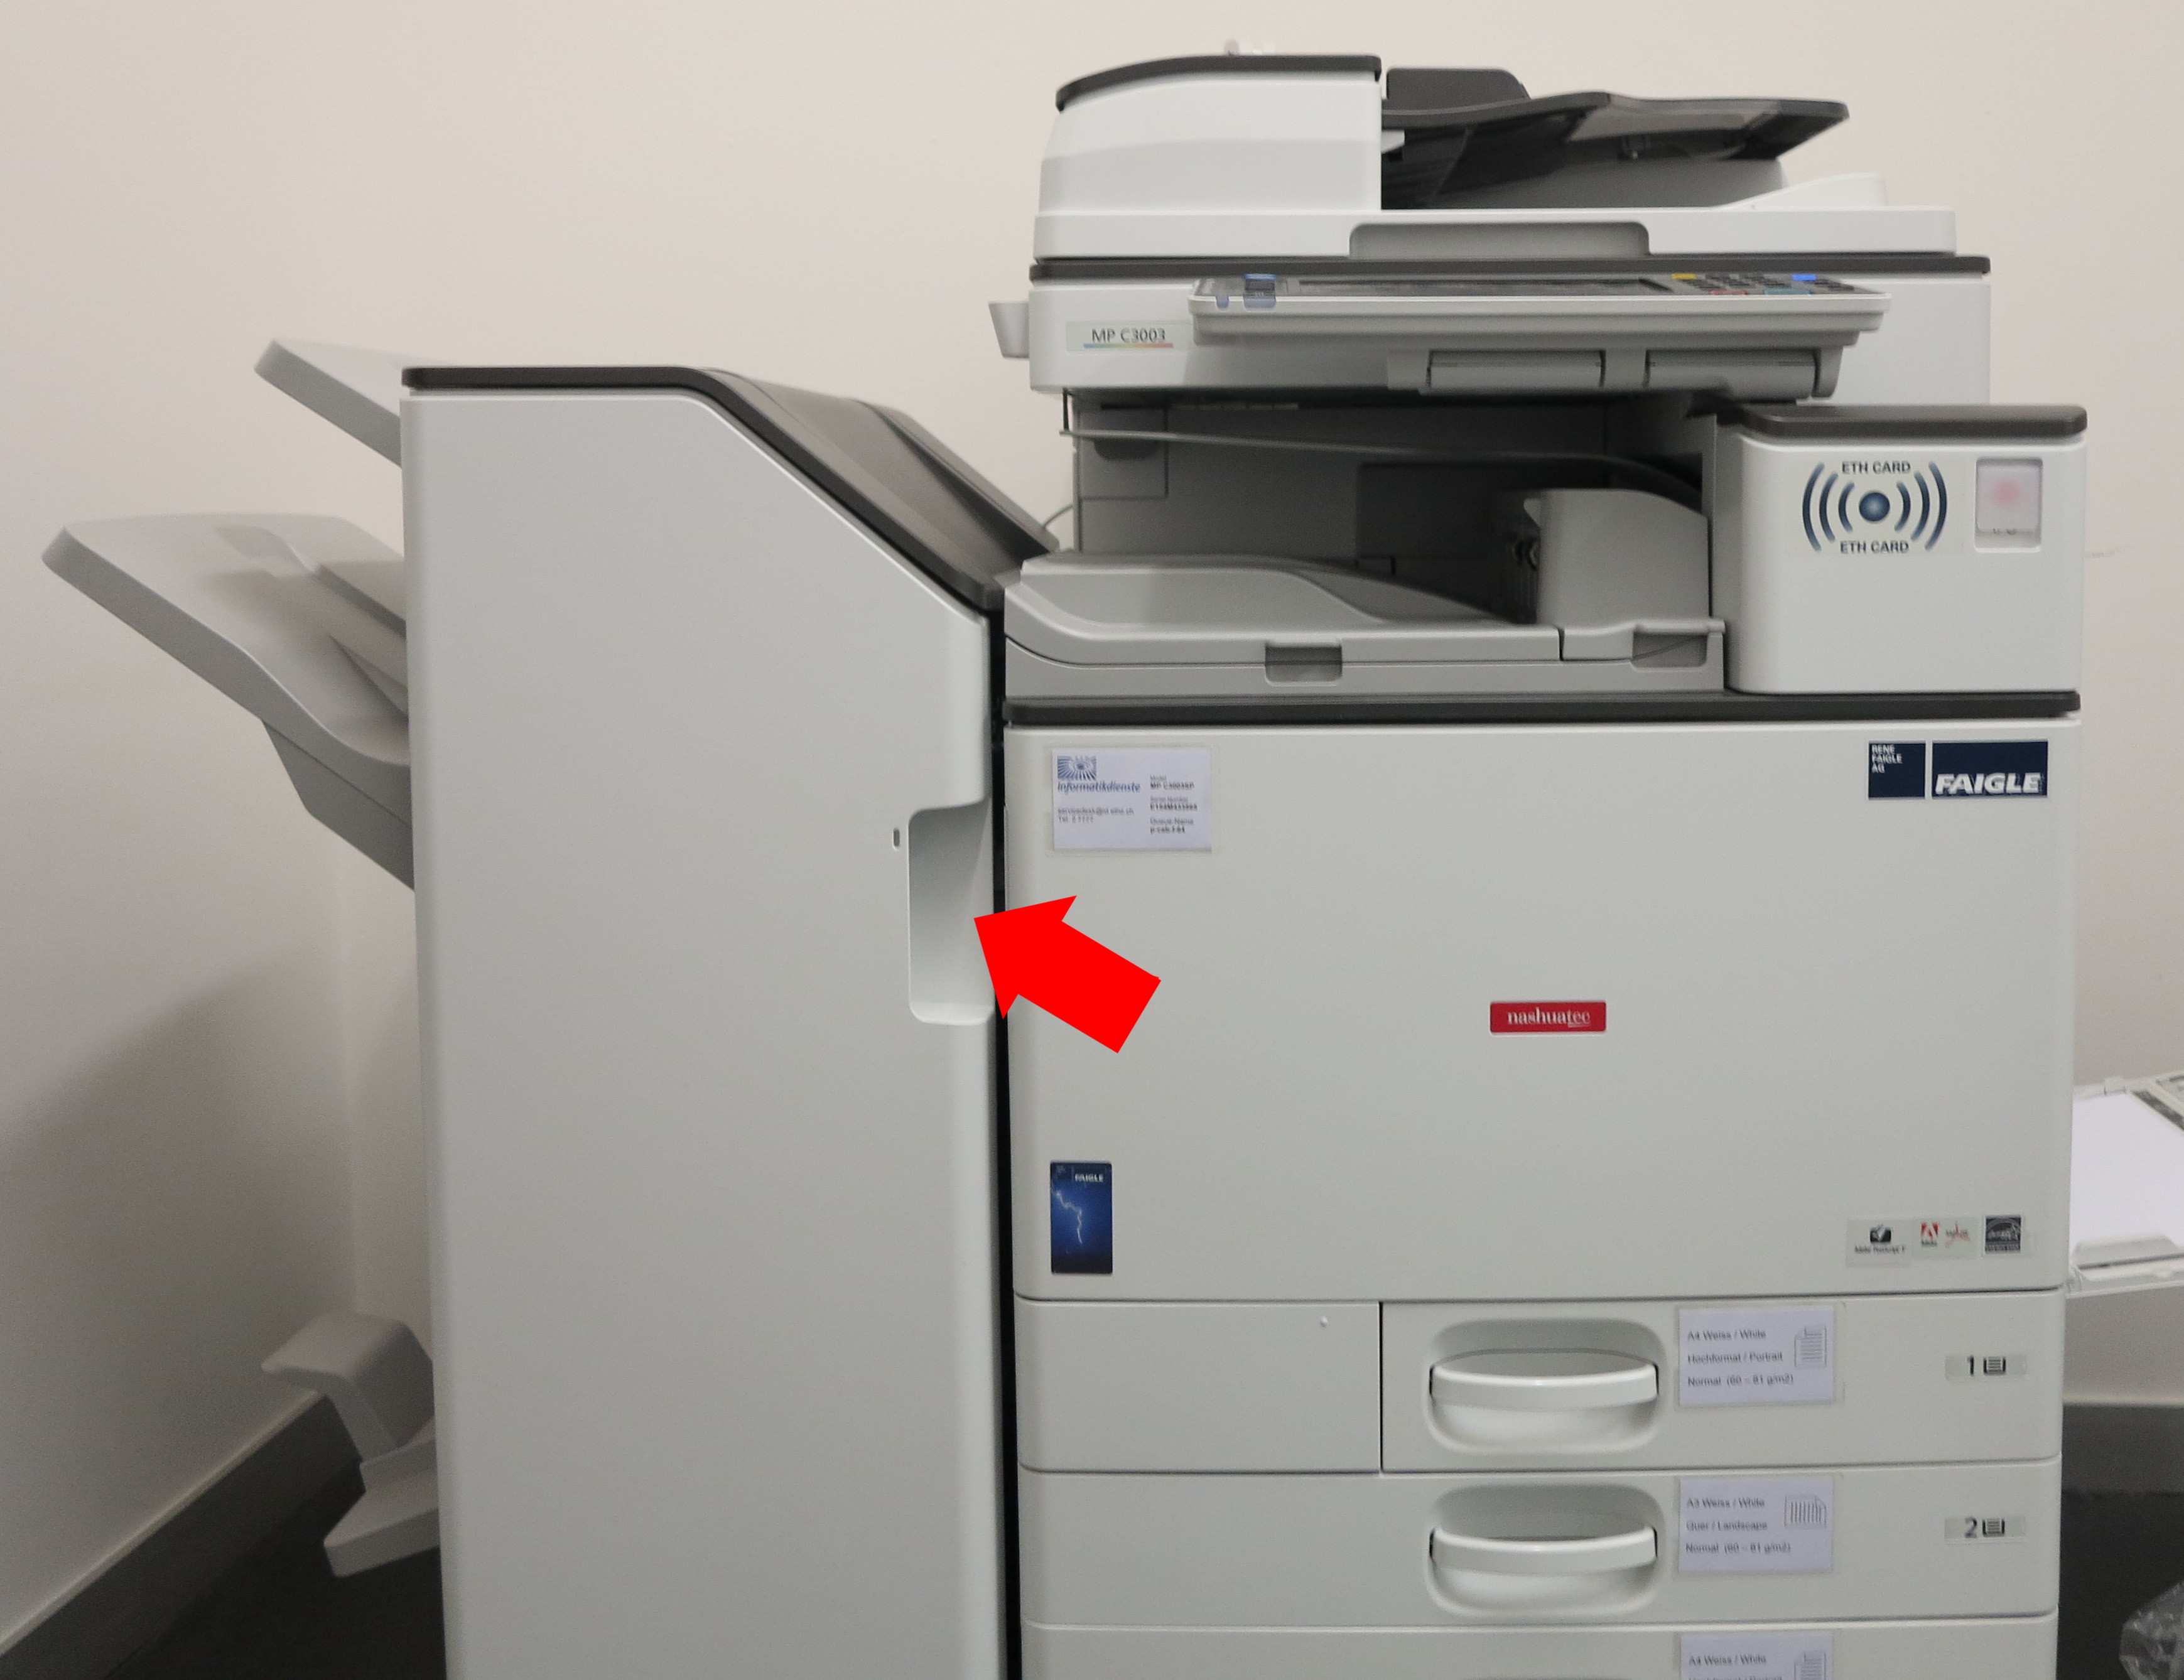
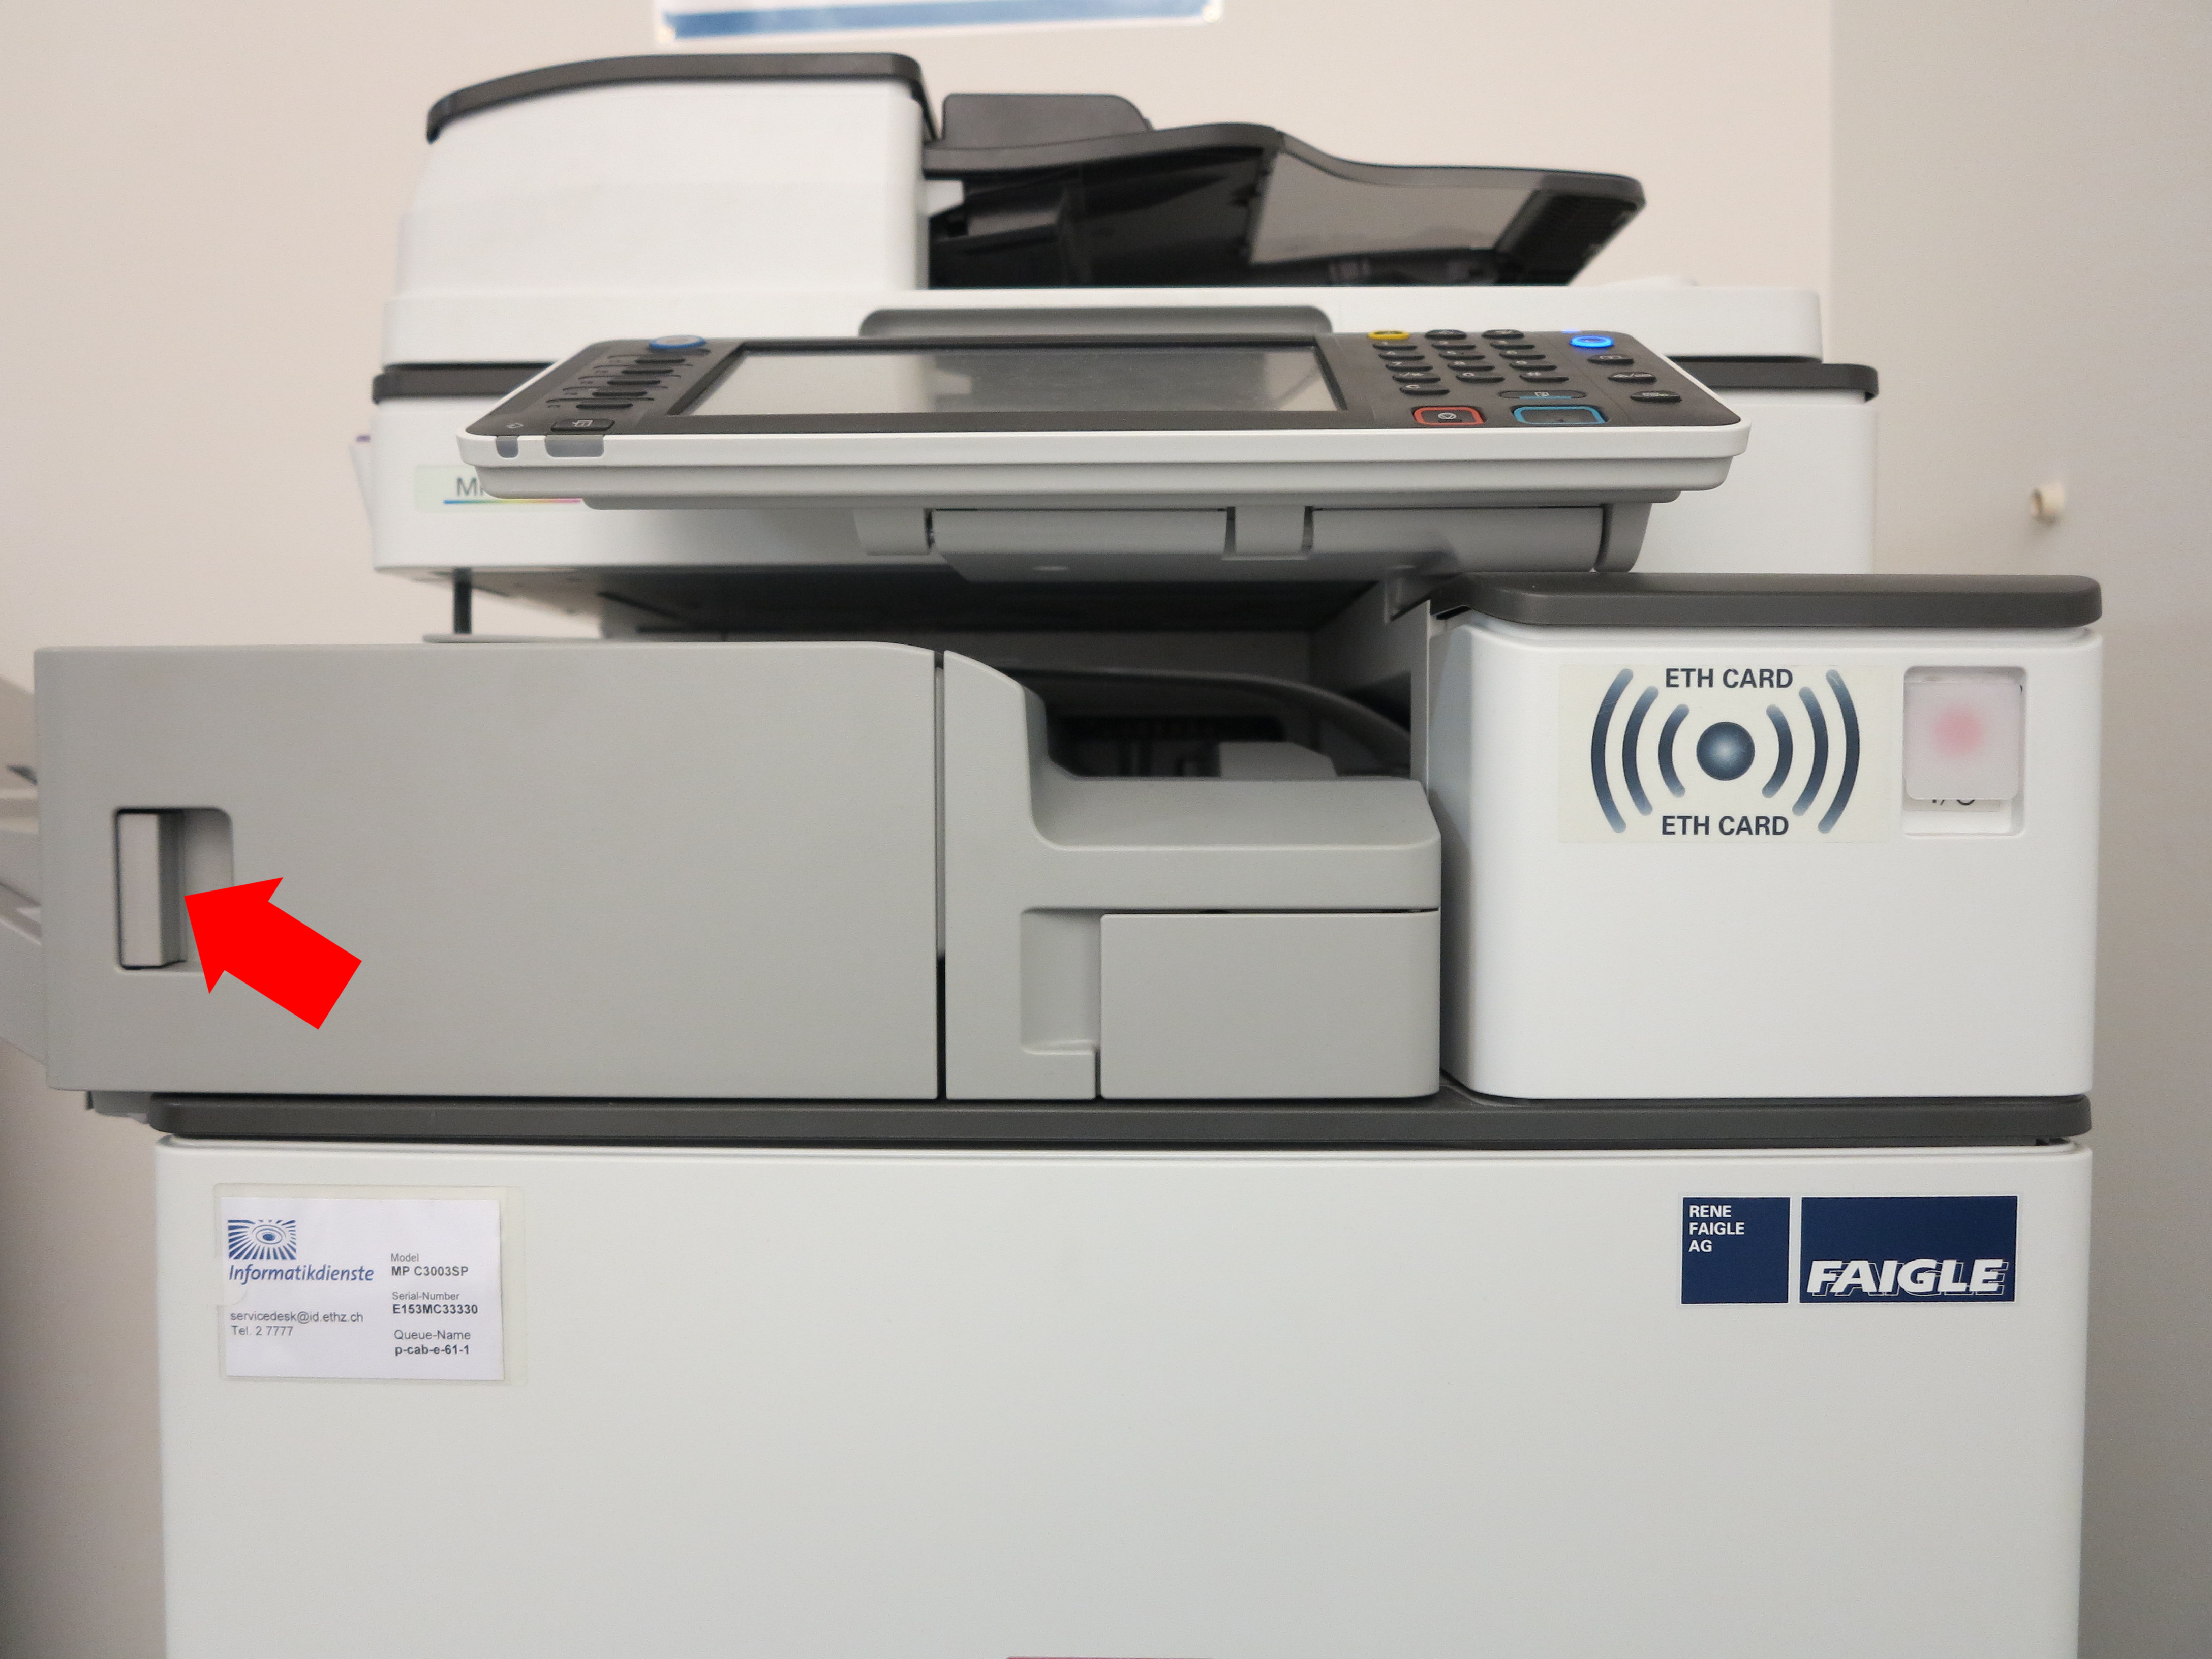
Open the compartment that contains the staple tray by opening the door marked in the image.

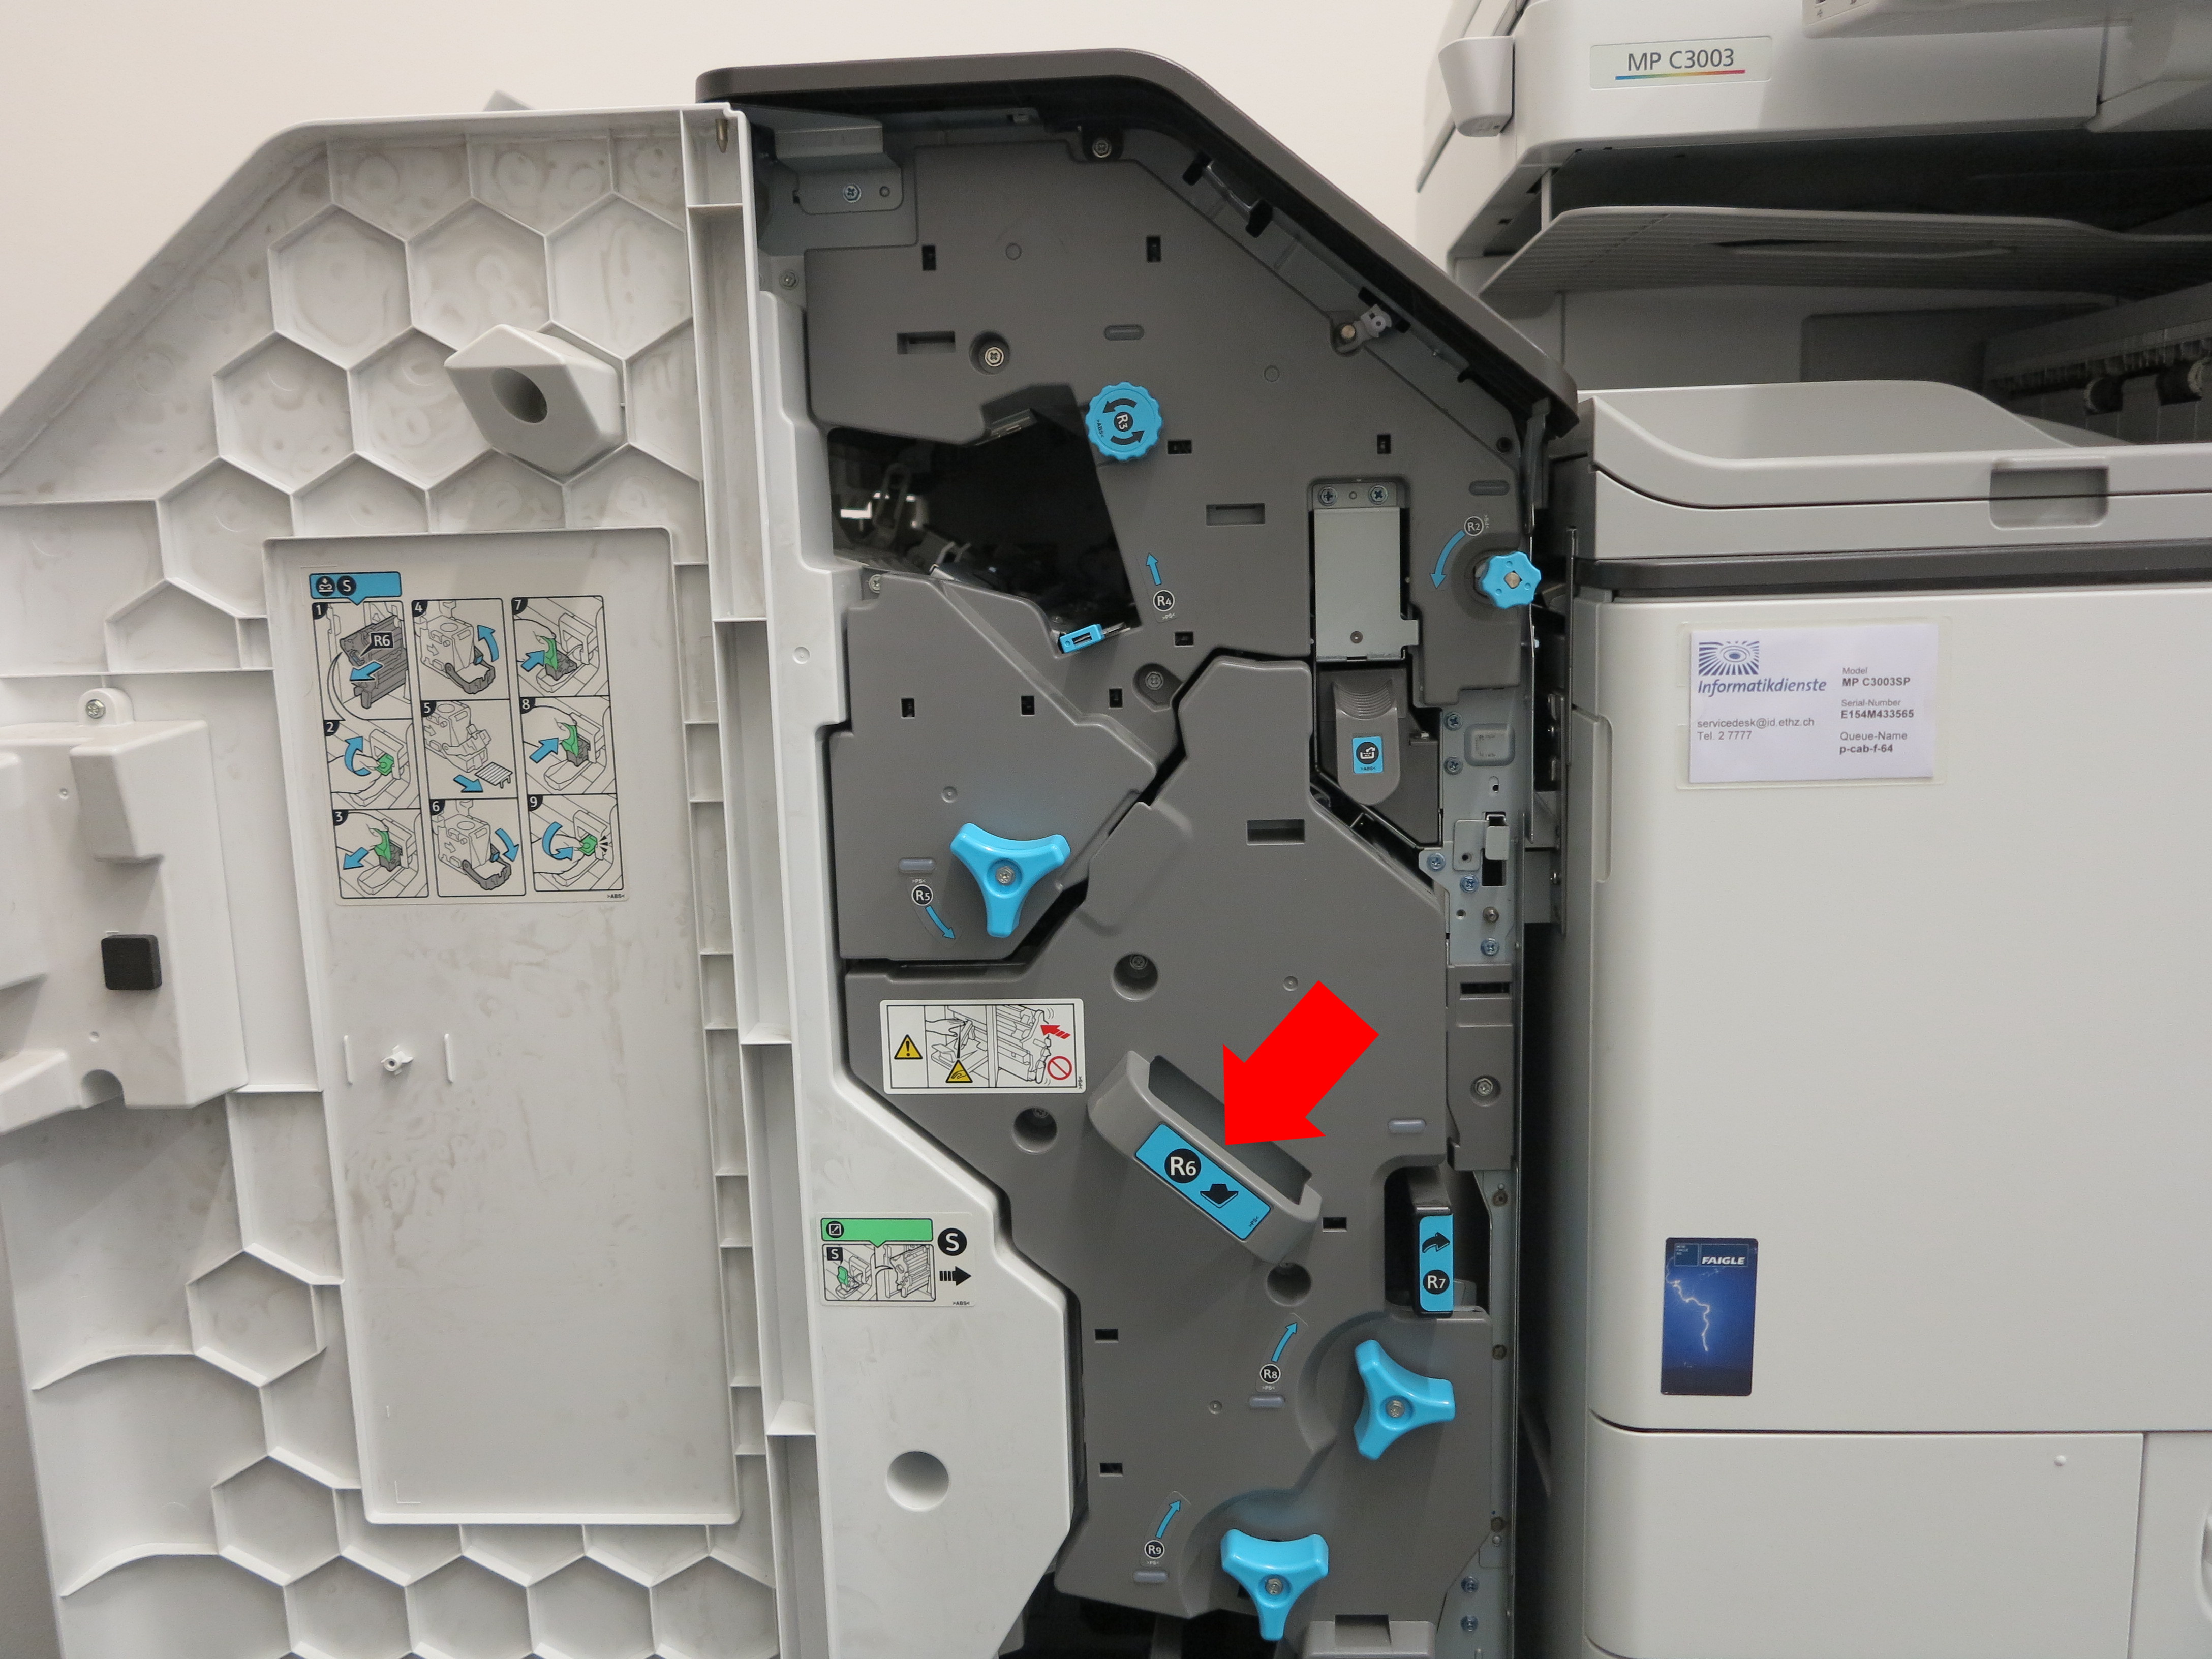
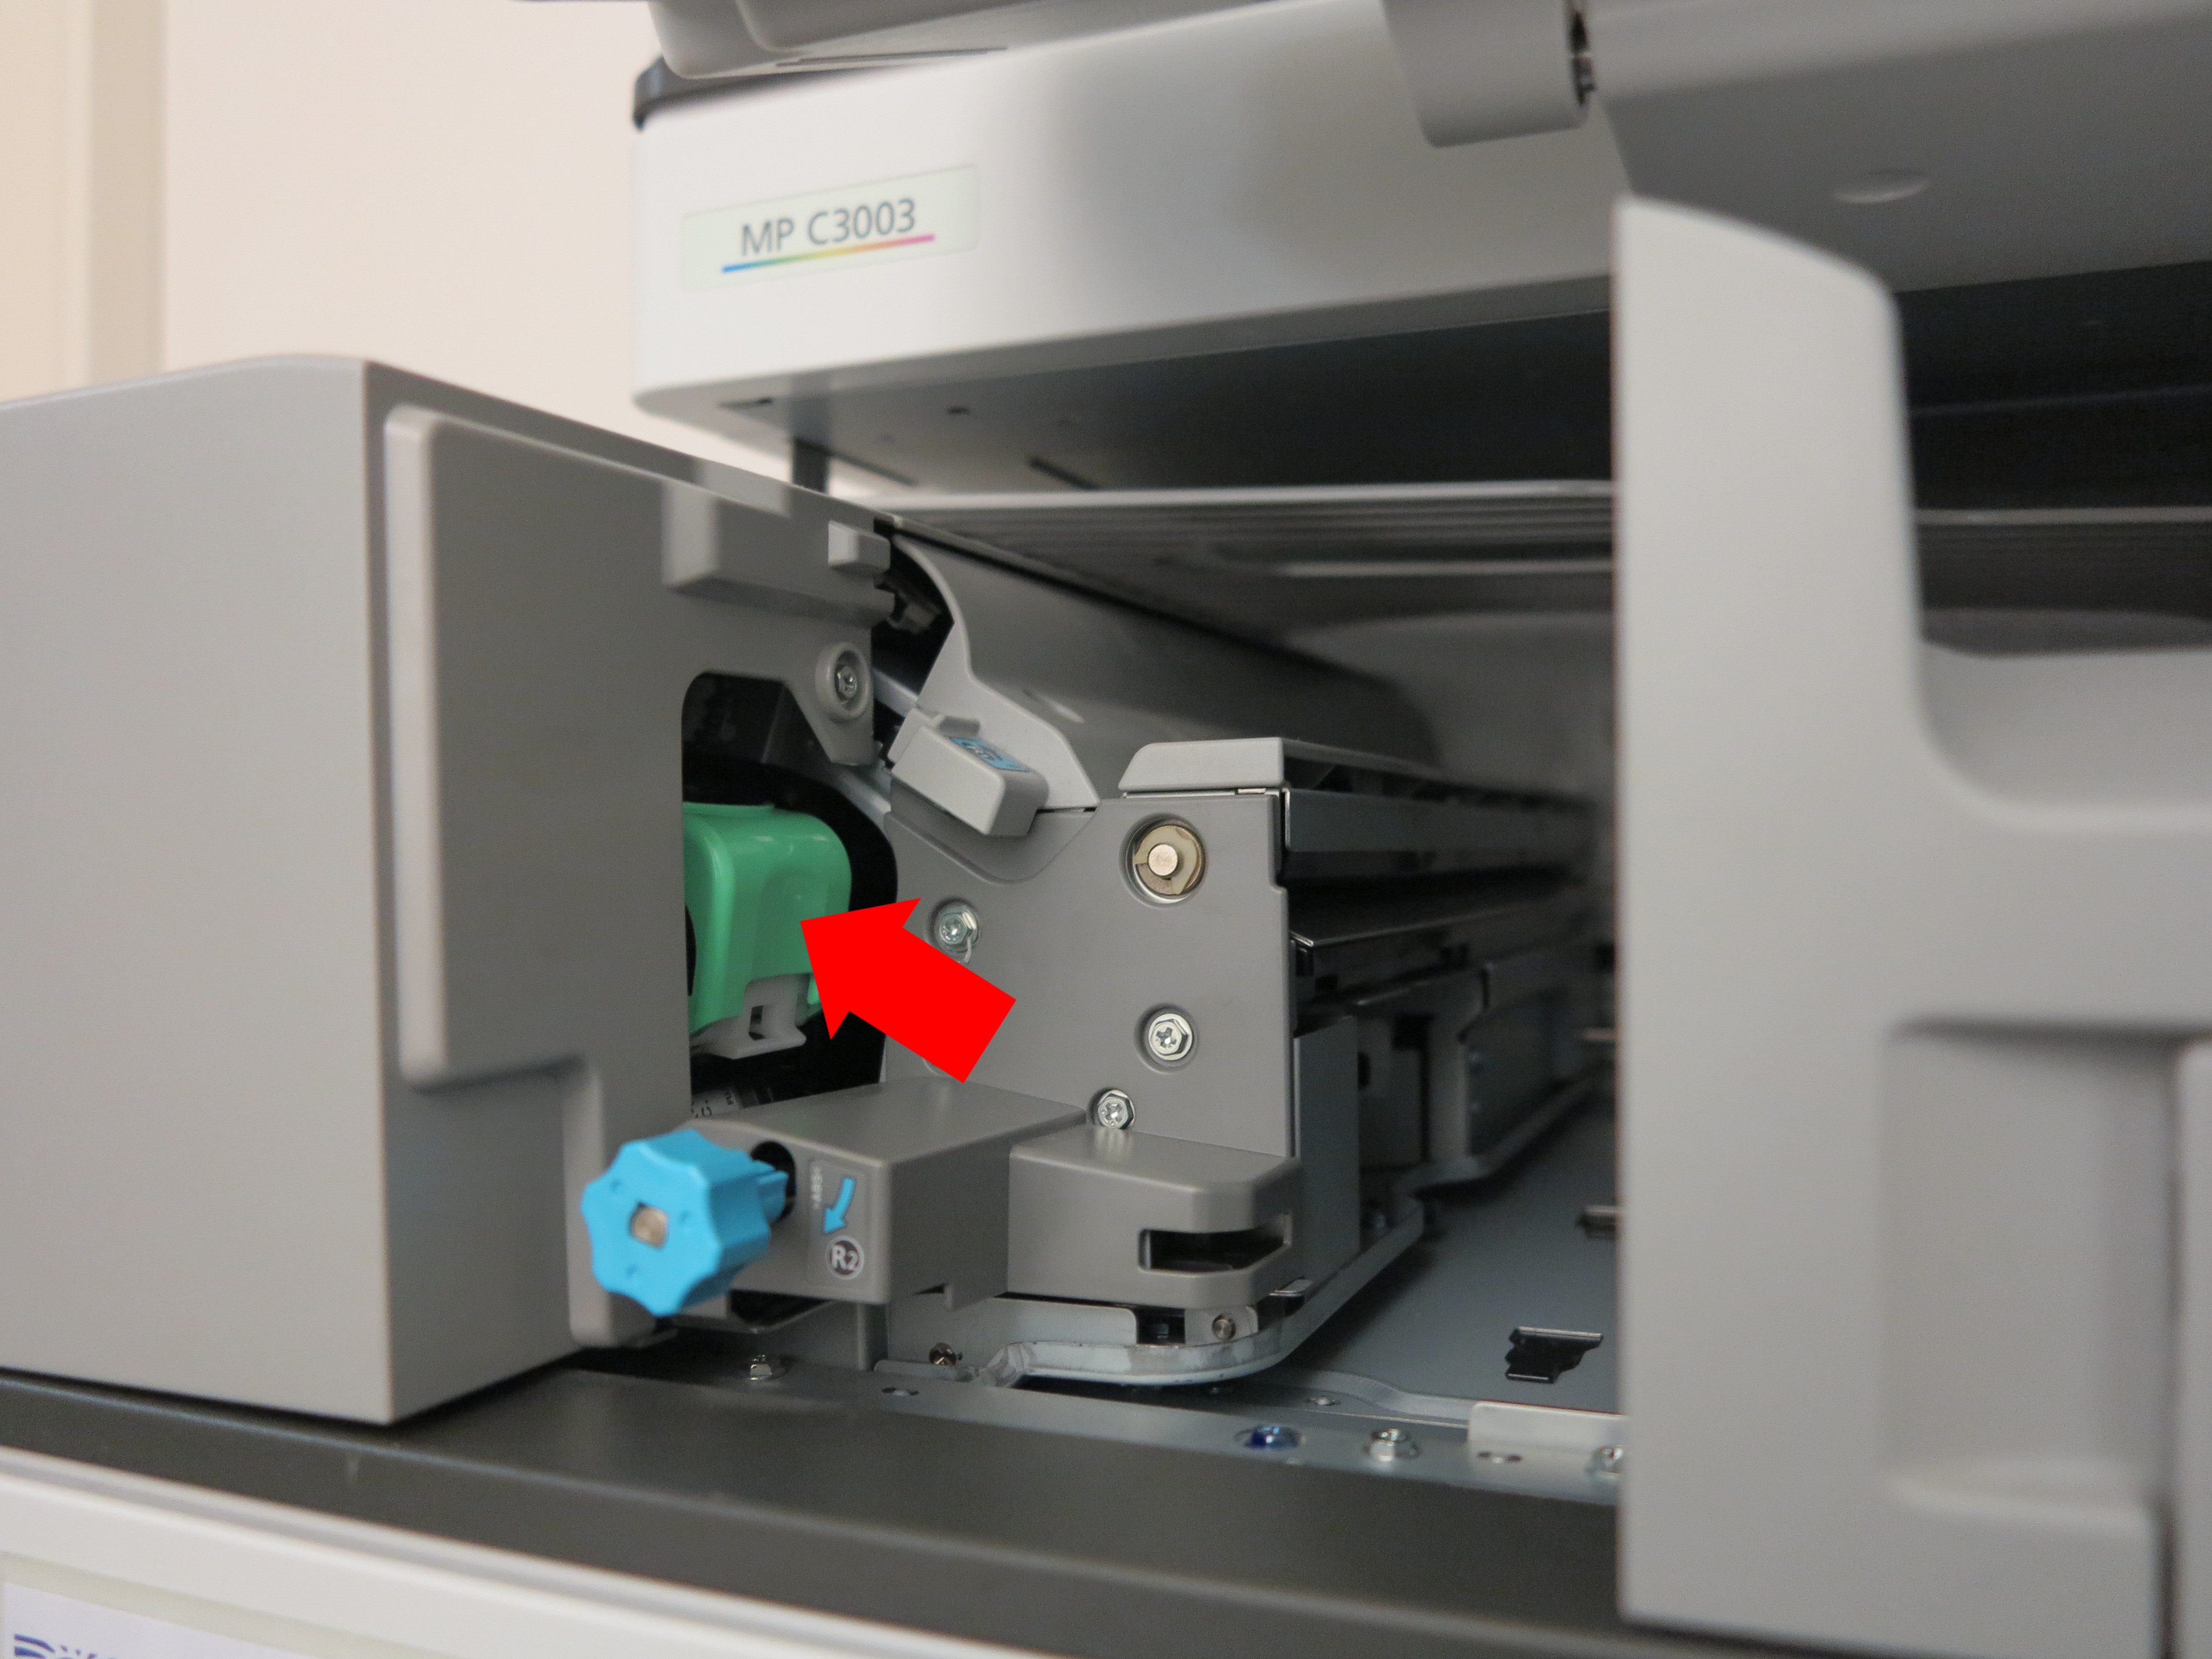
Pull the marked handle towards you, which will cause the staples tray to appear in the left hand side of the tray you just pulled out.

The staples tray can now be removed by pushing the green piece on the tray upwards. After that, it is possible to pull out the tray.
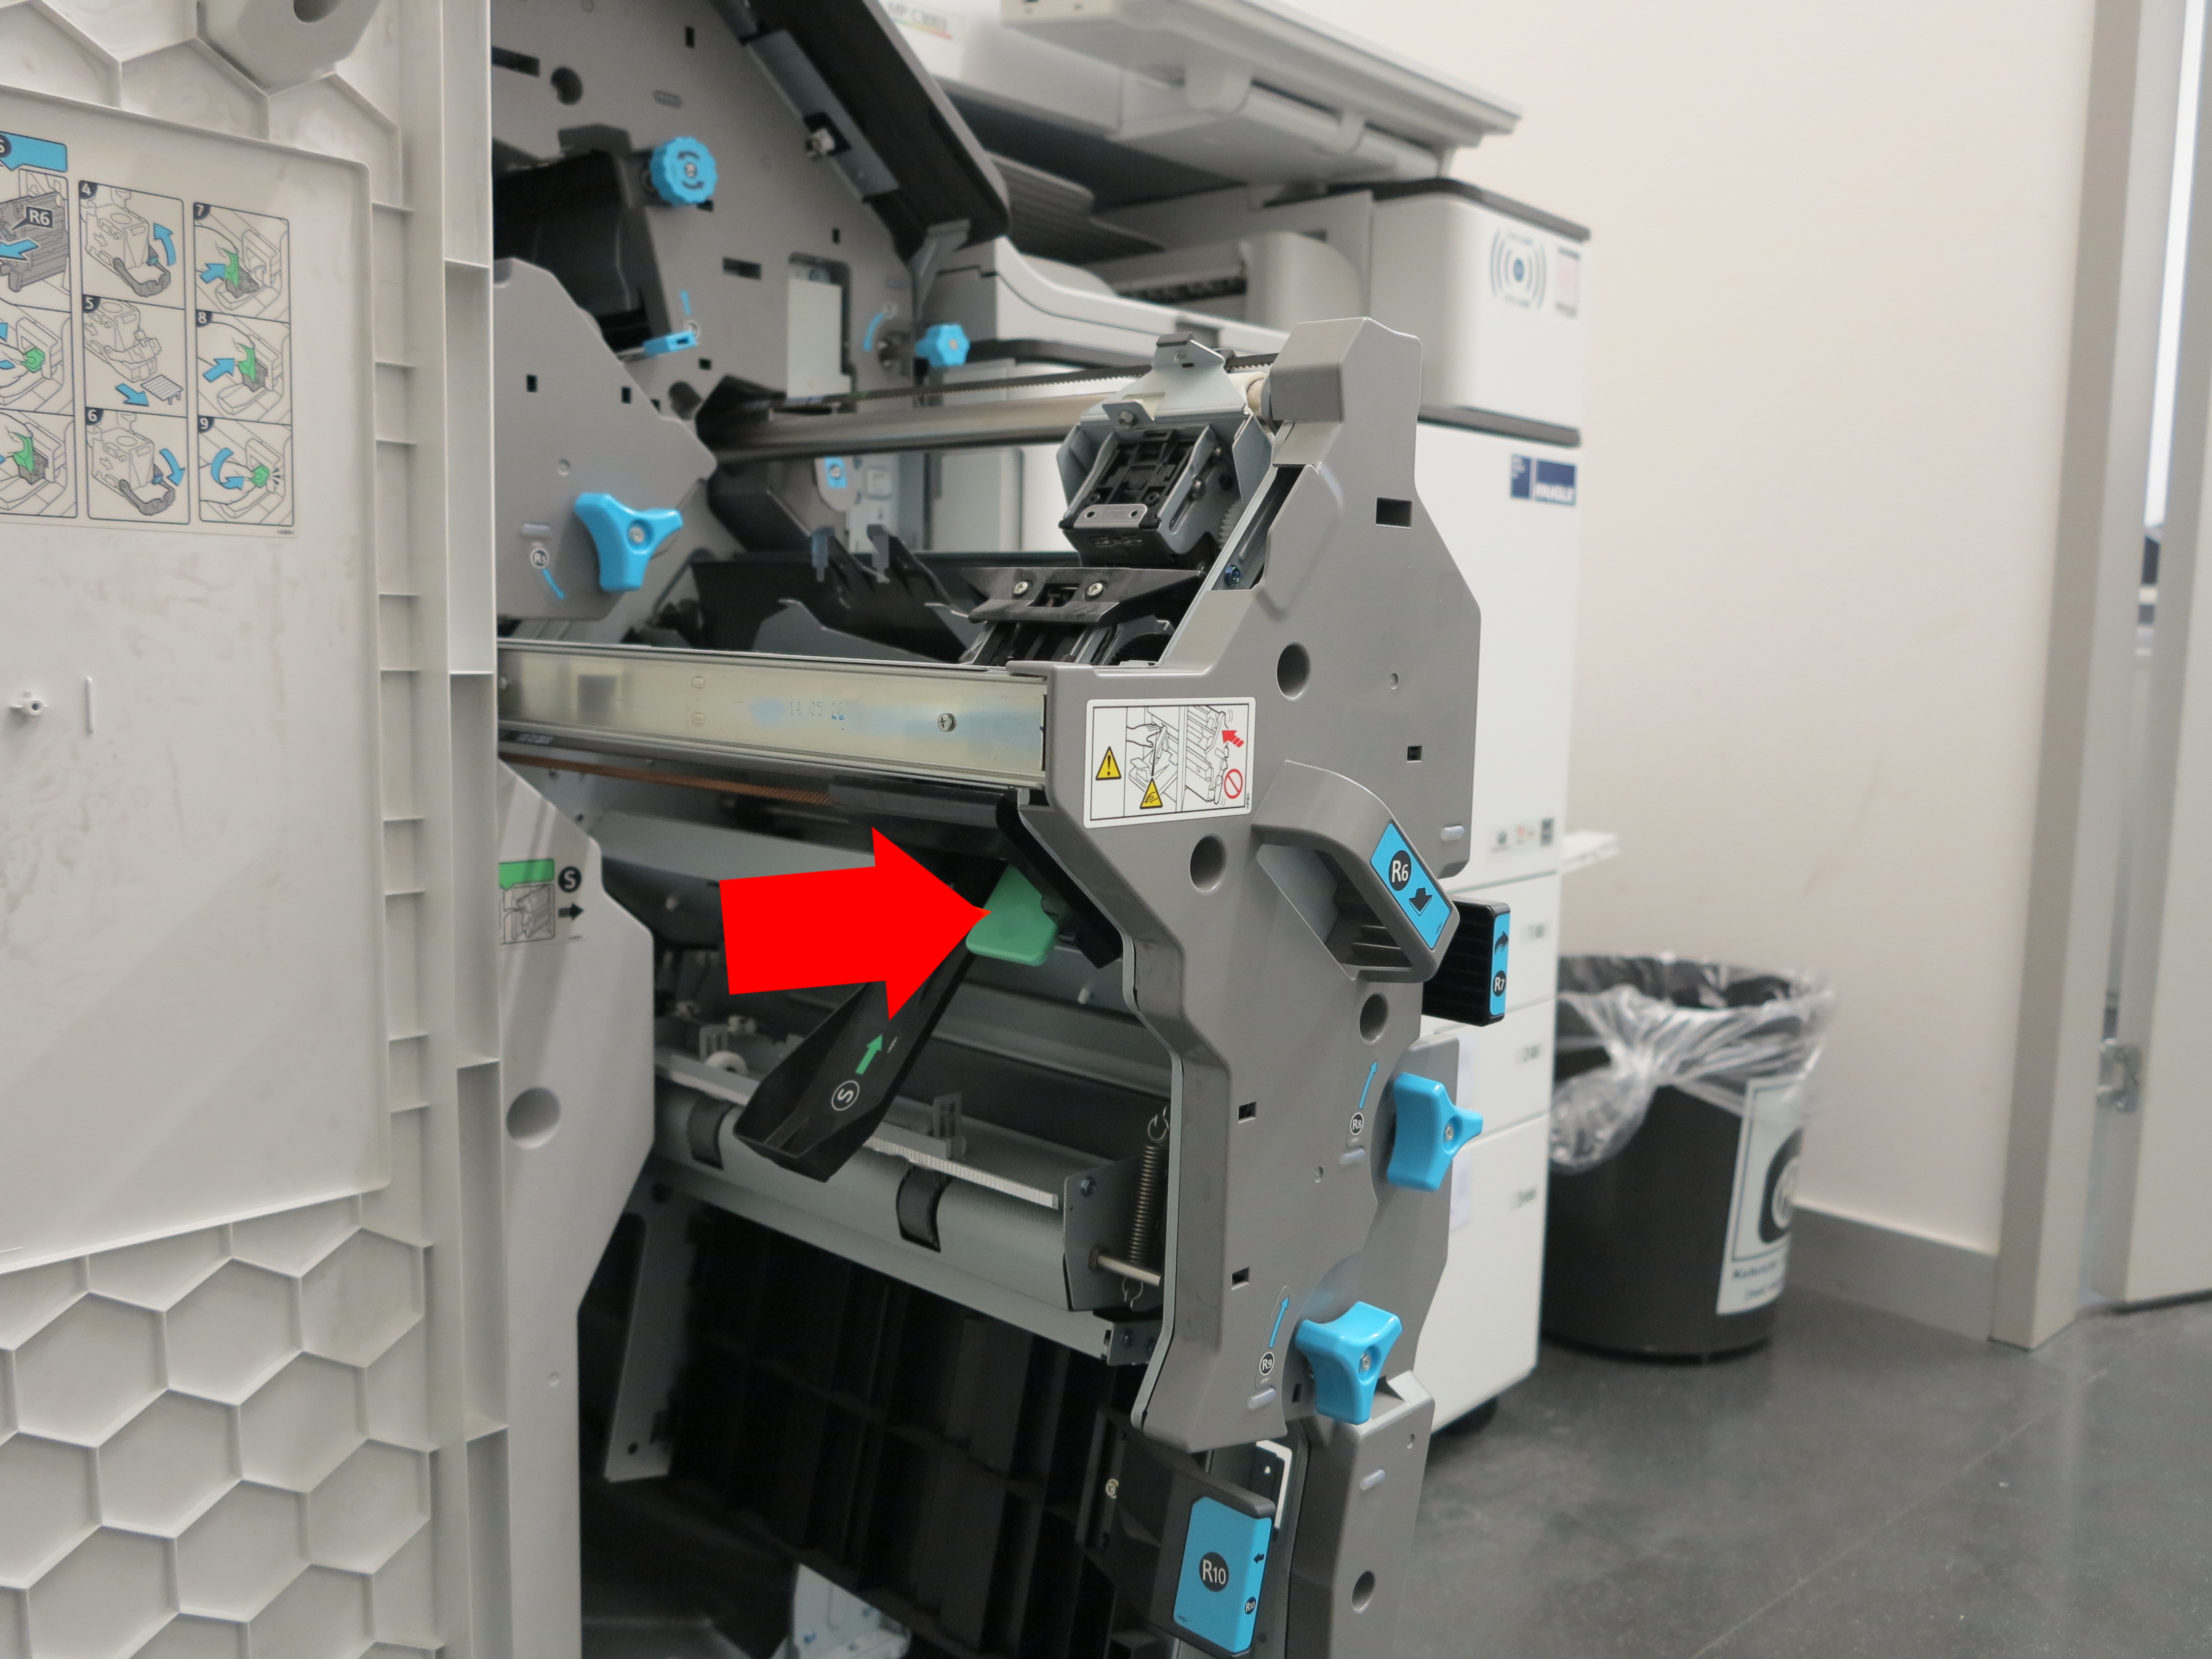
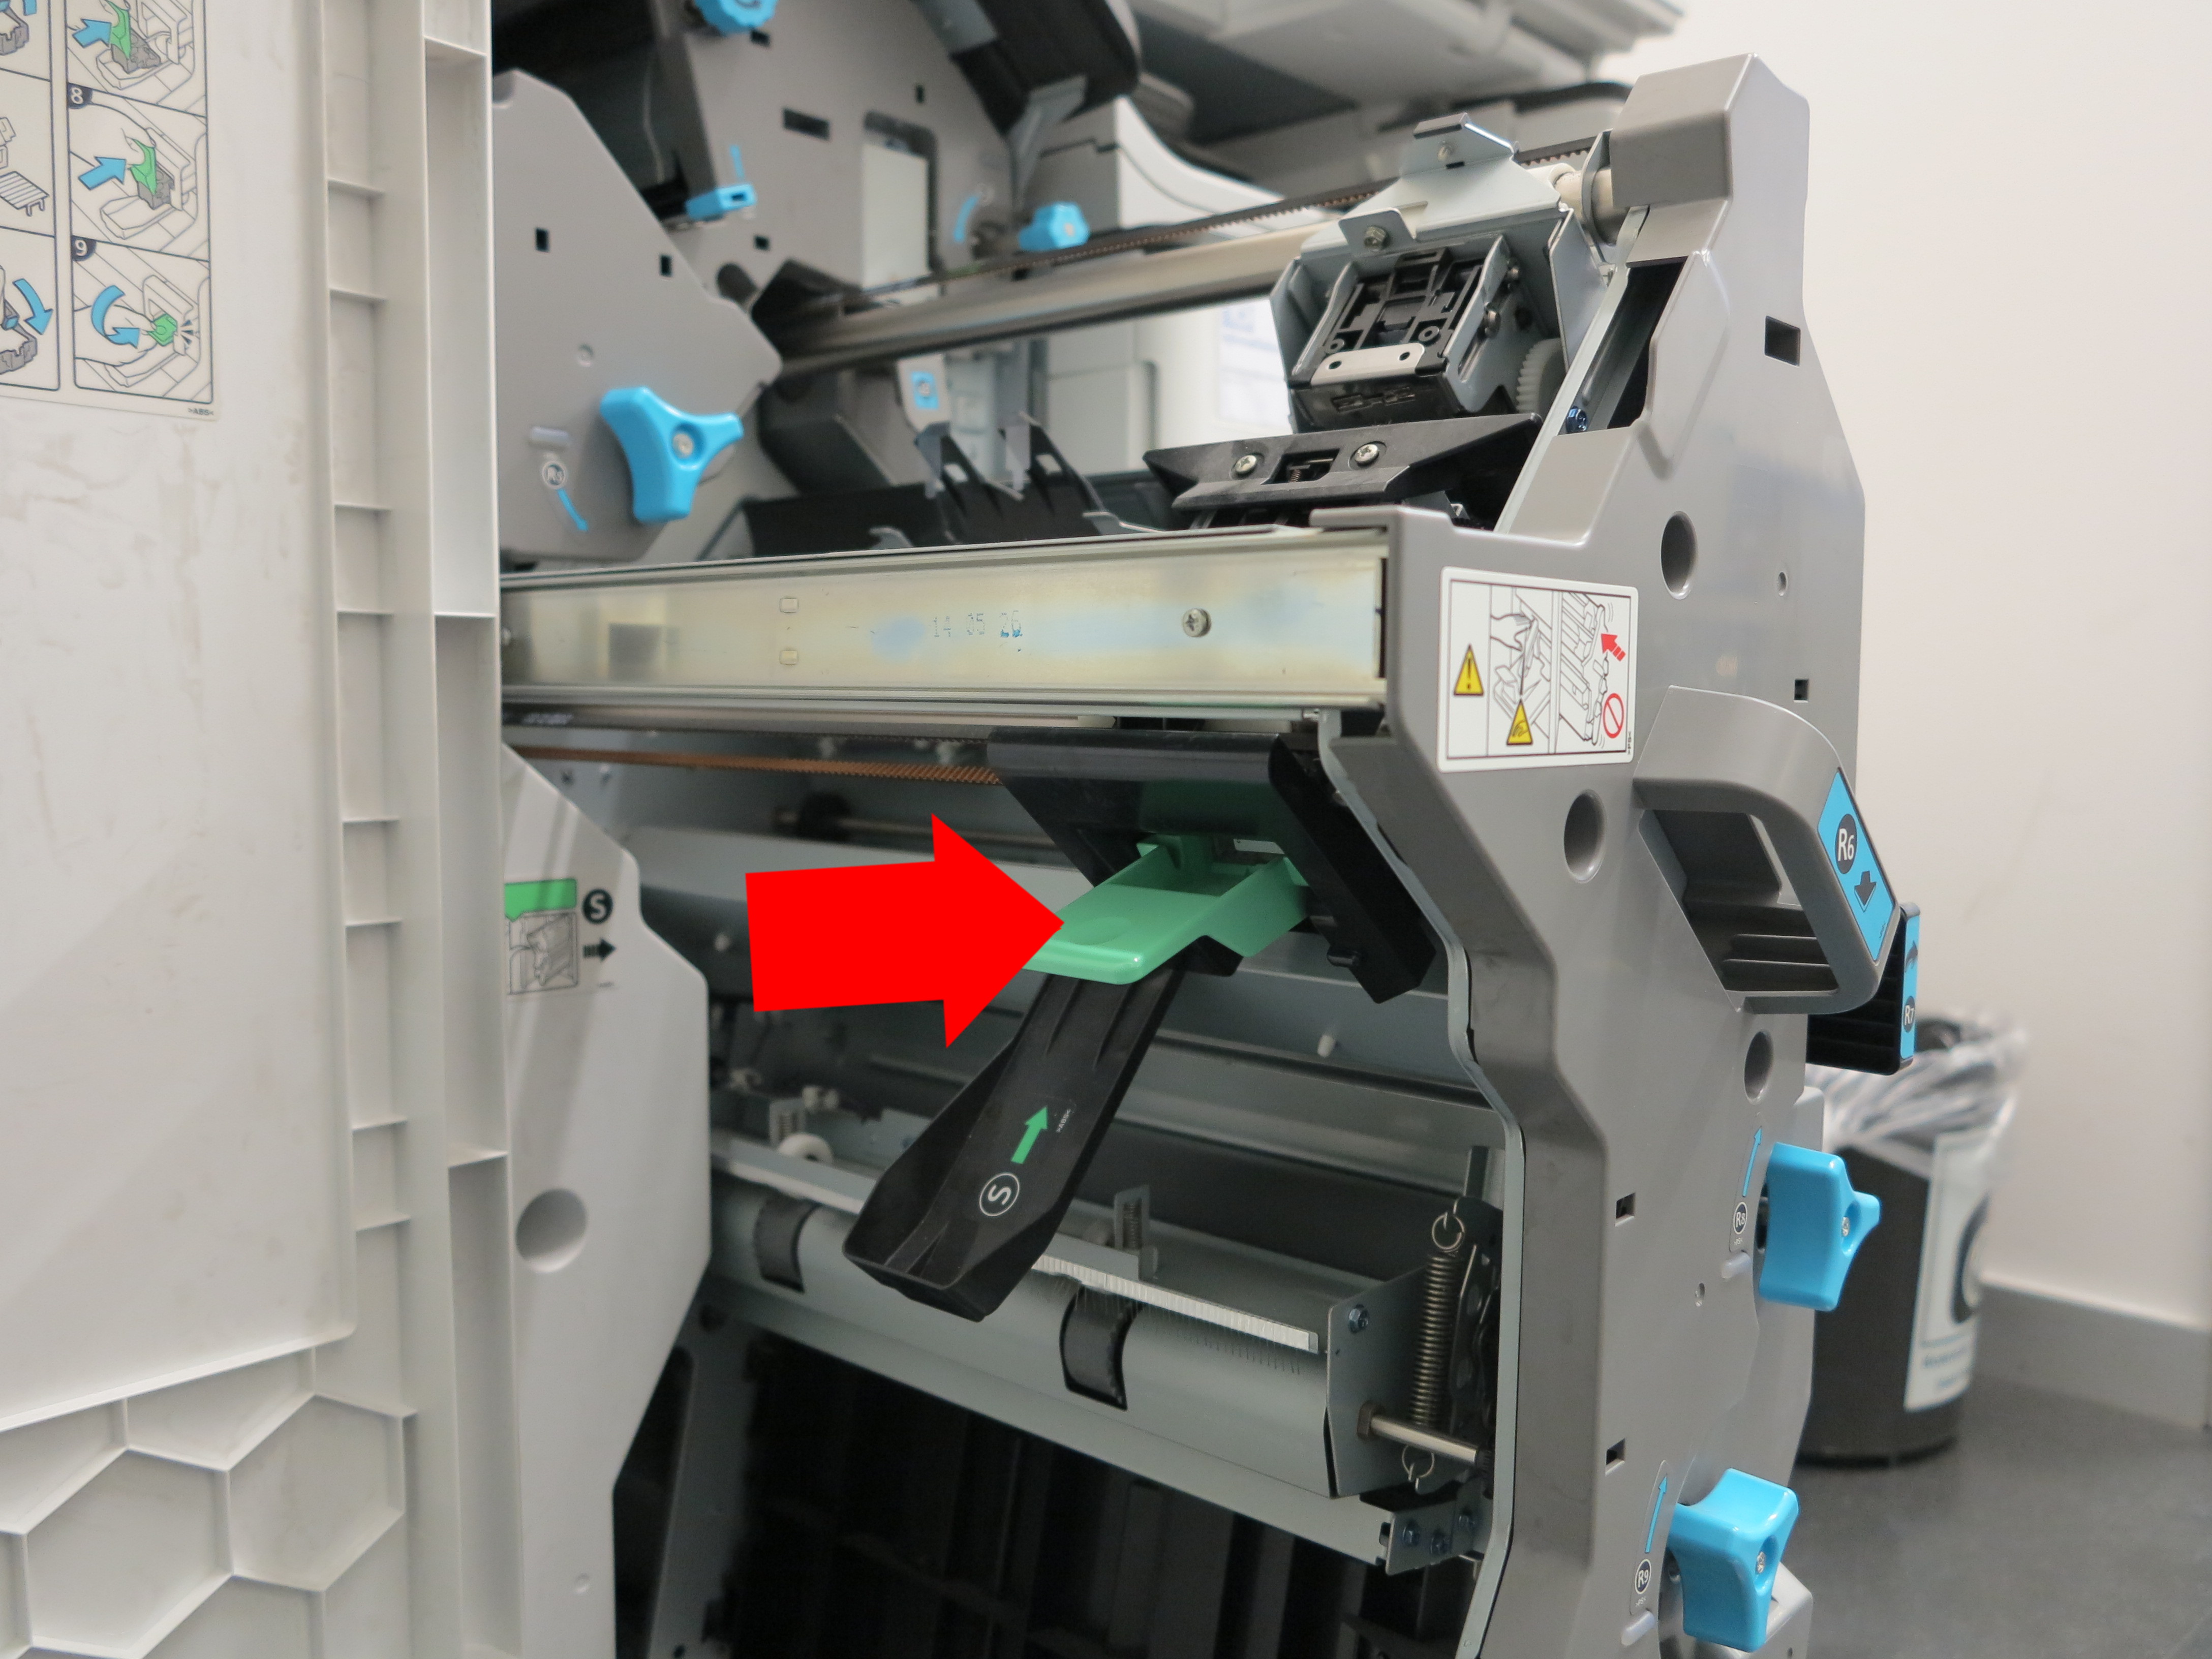
The new staple tray can now be inserted back by pushing it back into the slot. Then push the green piece back into its previous position which will lock the tray. Then push the larger tray containing the staples tray back in and close the door to the compartment. Check the printer screen to see if the staples have been changed successfully. If there is a warning, something went wrong, otherwise everything should be fine.


Without Finisher
Pull to the left with the marked handle in order to open the compartment that contains the staple tray.
Pull the green piece of the staple tray out of the slot, which will loosen the tray. After that, it is possible to pull out the tray.
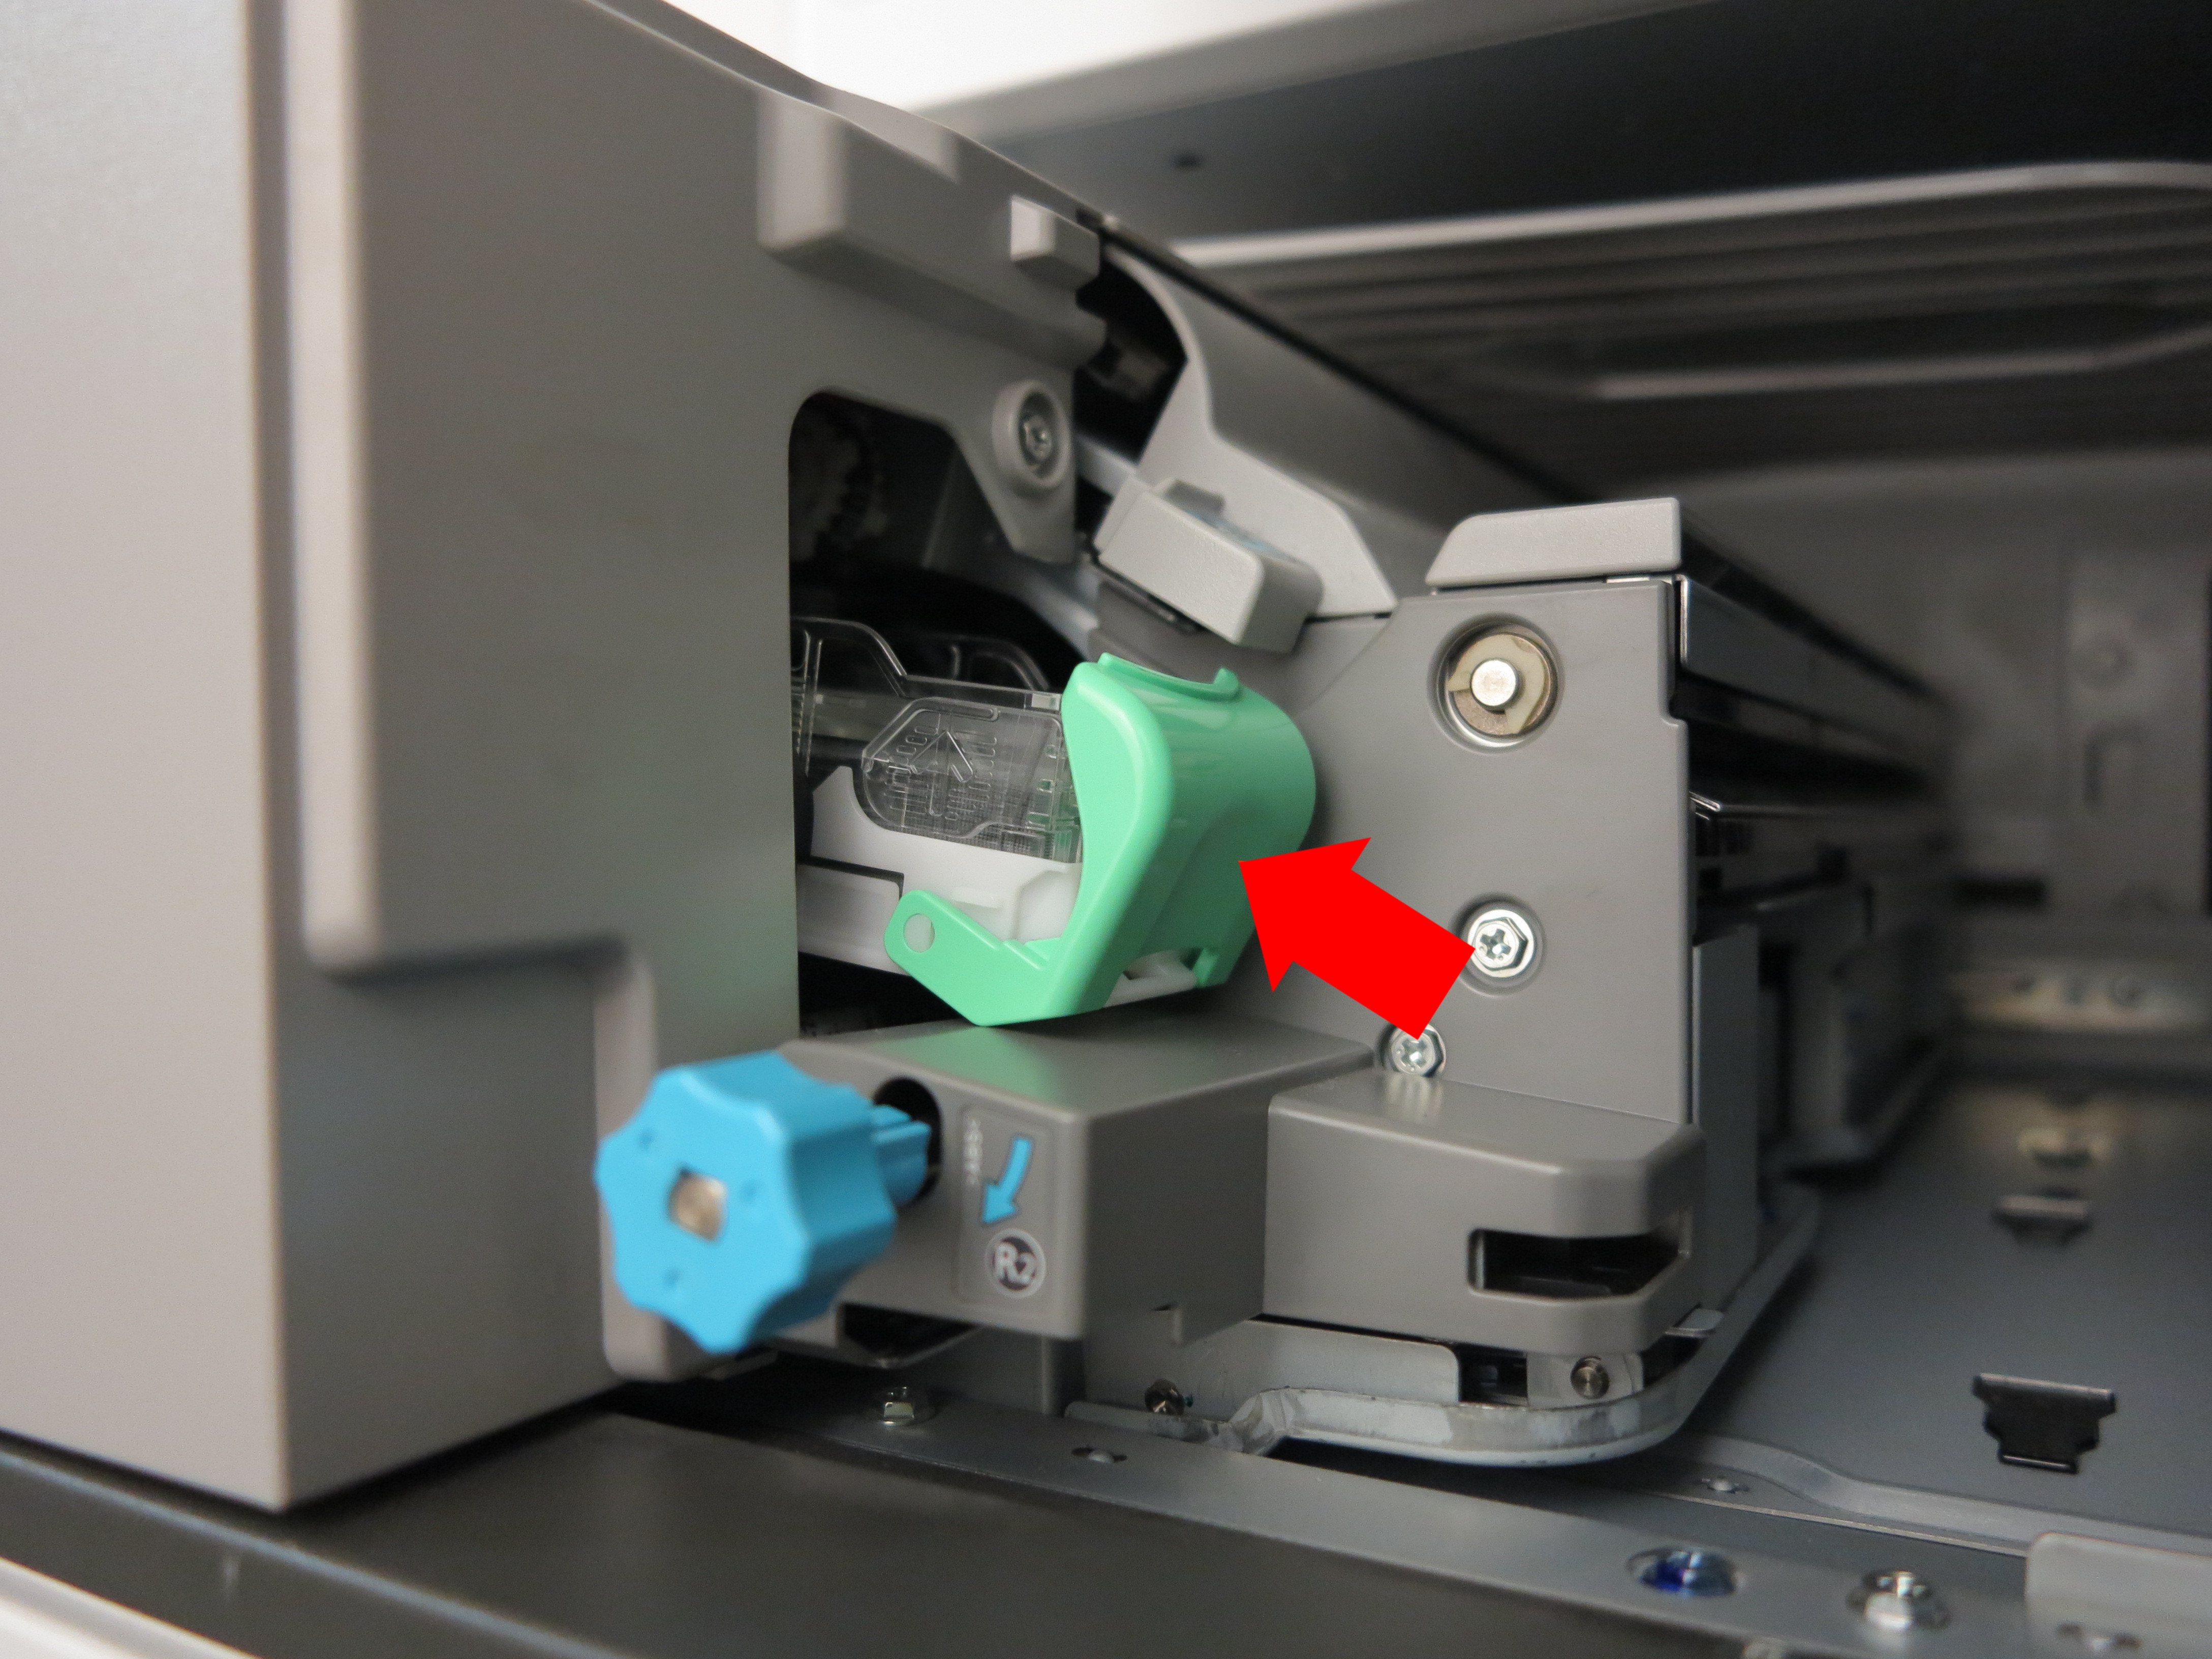
In order to remove the staples from the tray, push the two arrows inside and pull up. After that, you can insert the new staples by performing the same steps in reverse. If you have troubles opening the tray, it may be easier for you to push under the green plastic piece, which will have the same effect as pushing on the arrows.
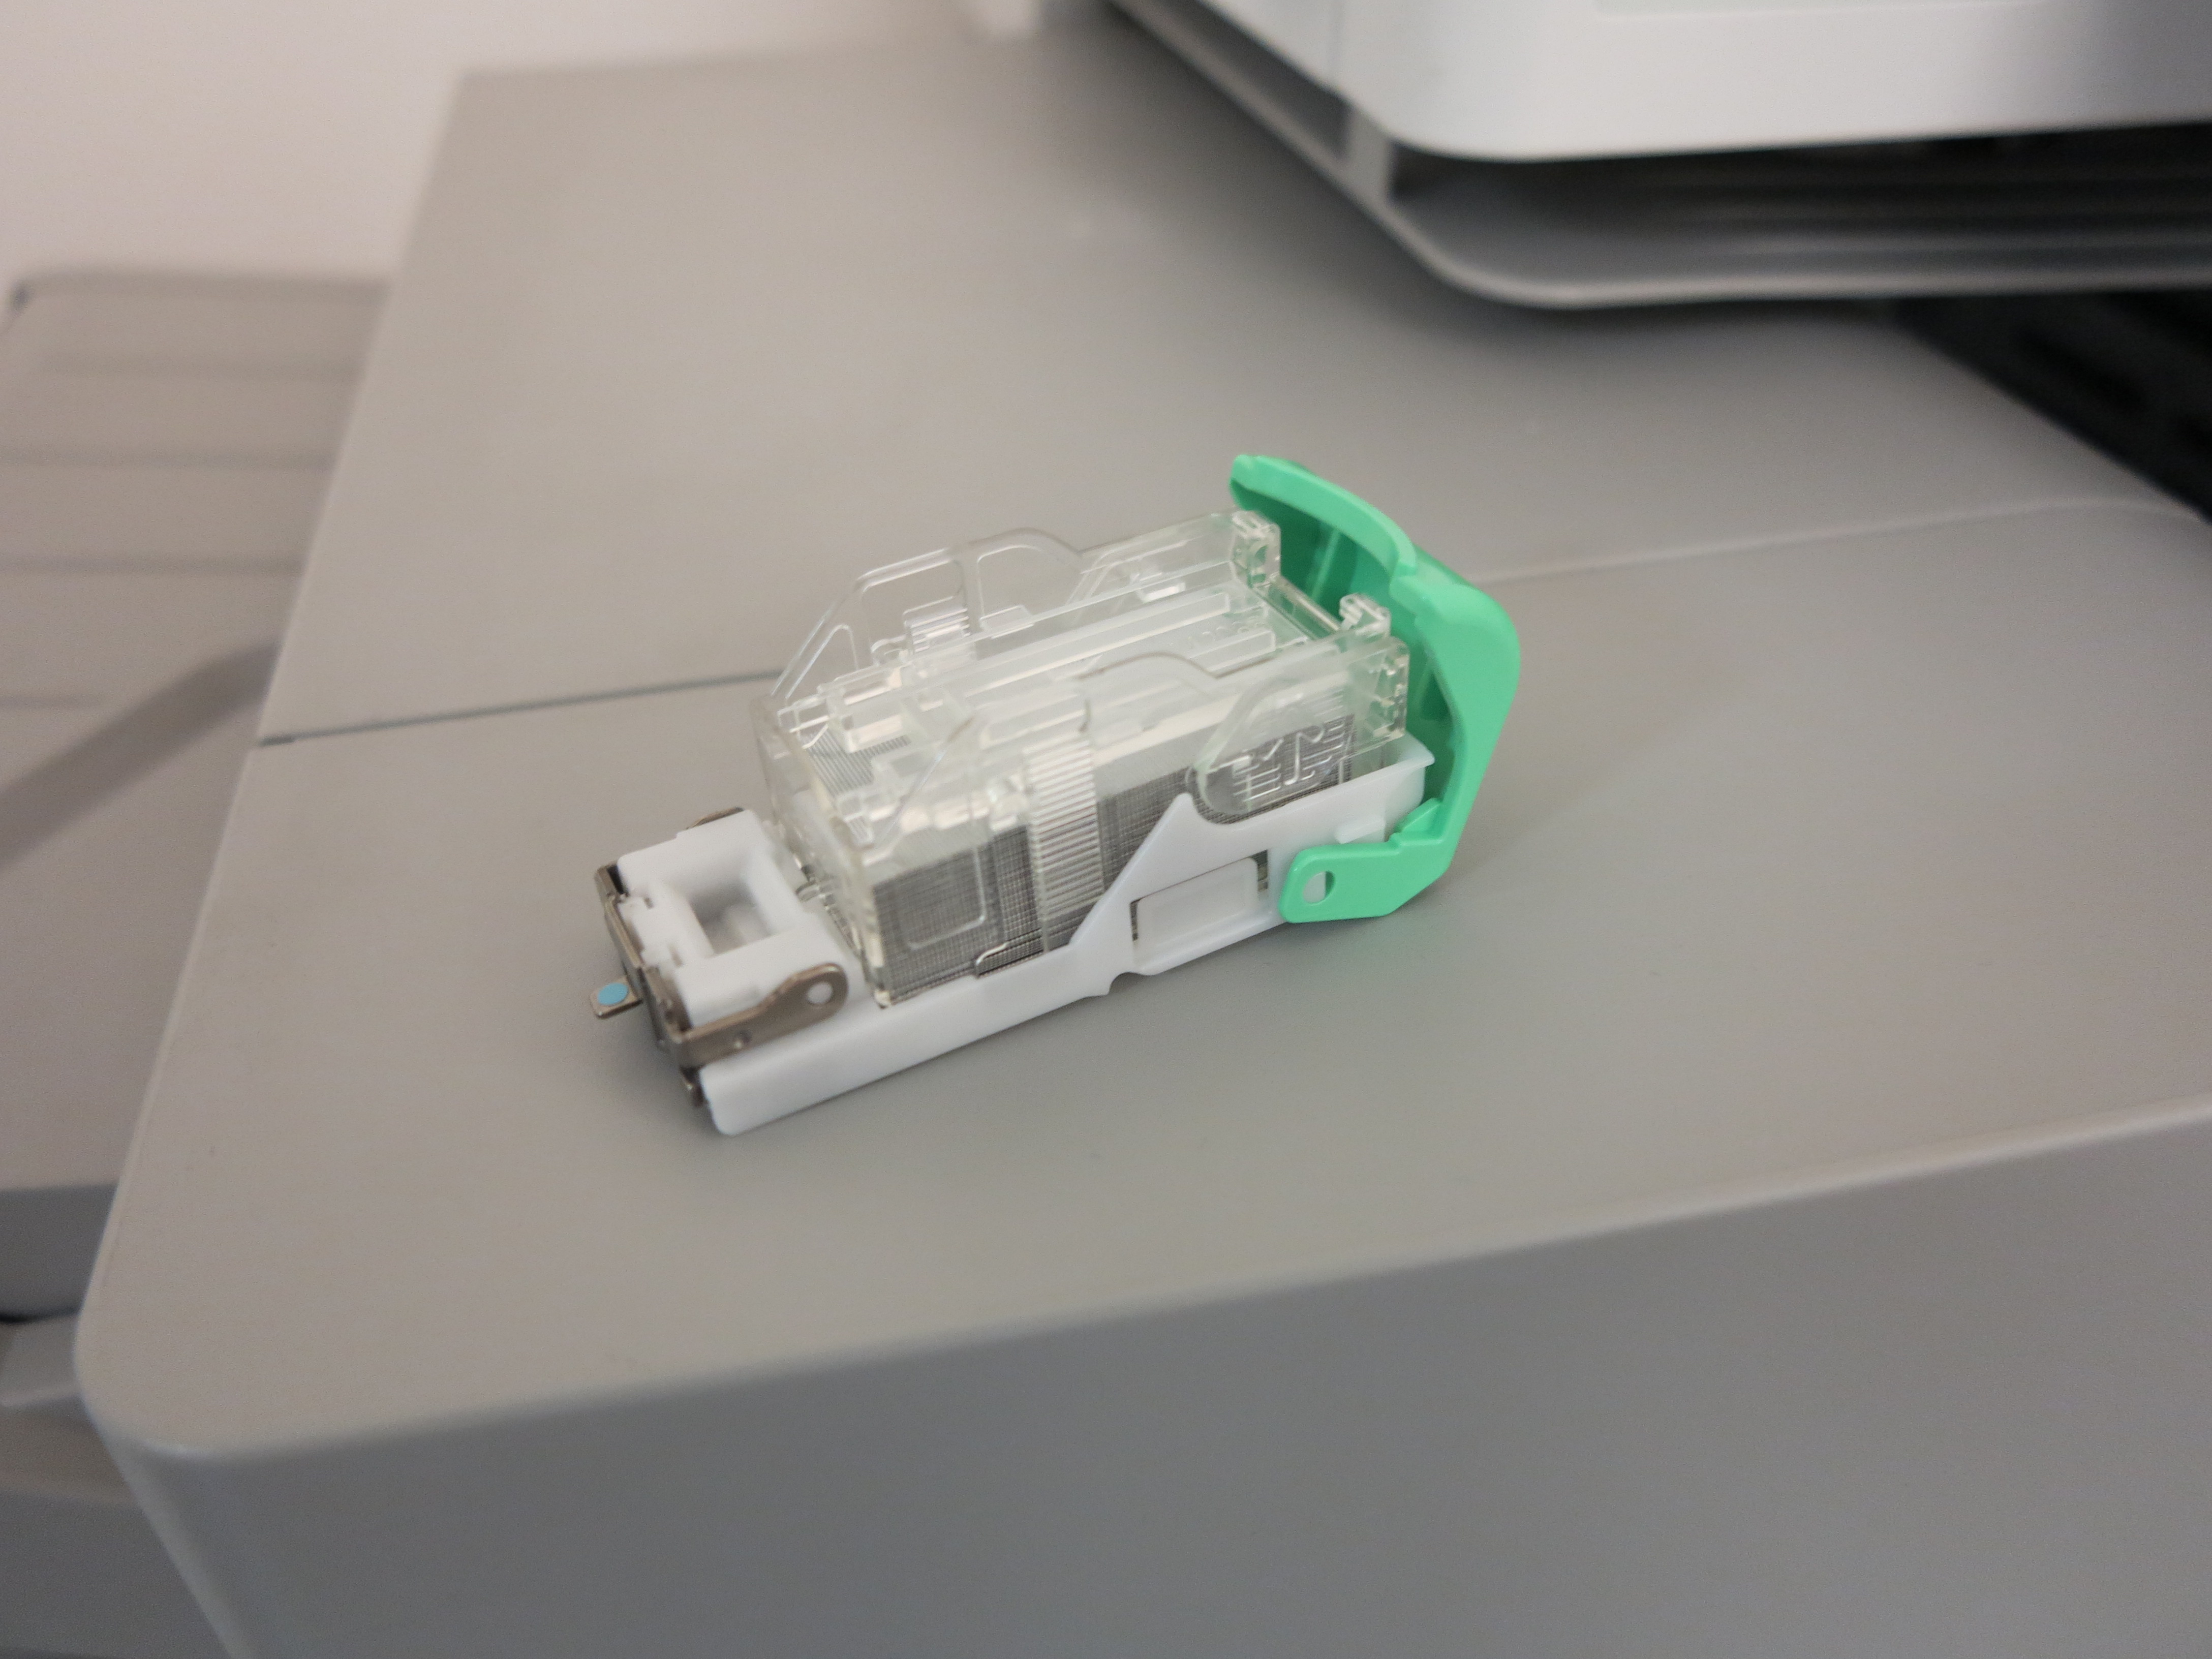
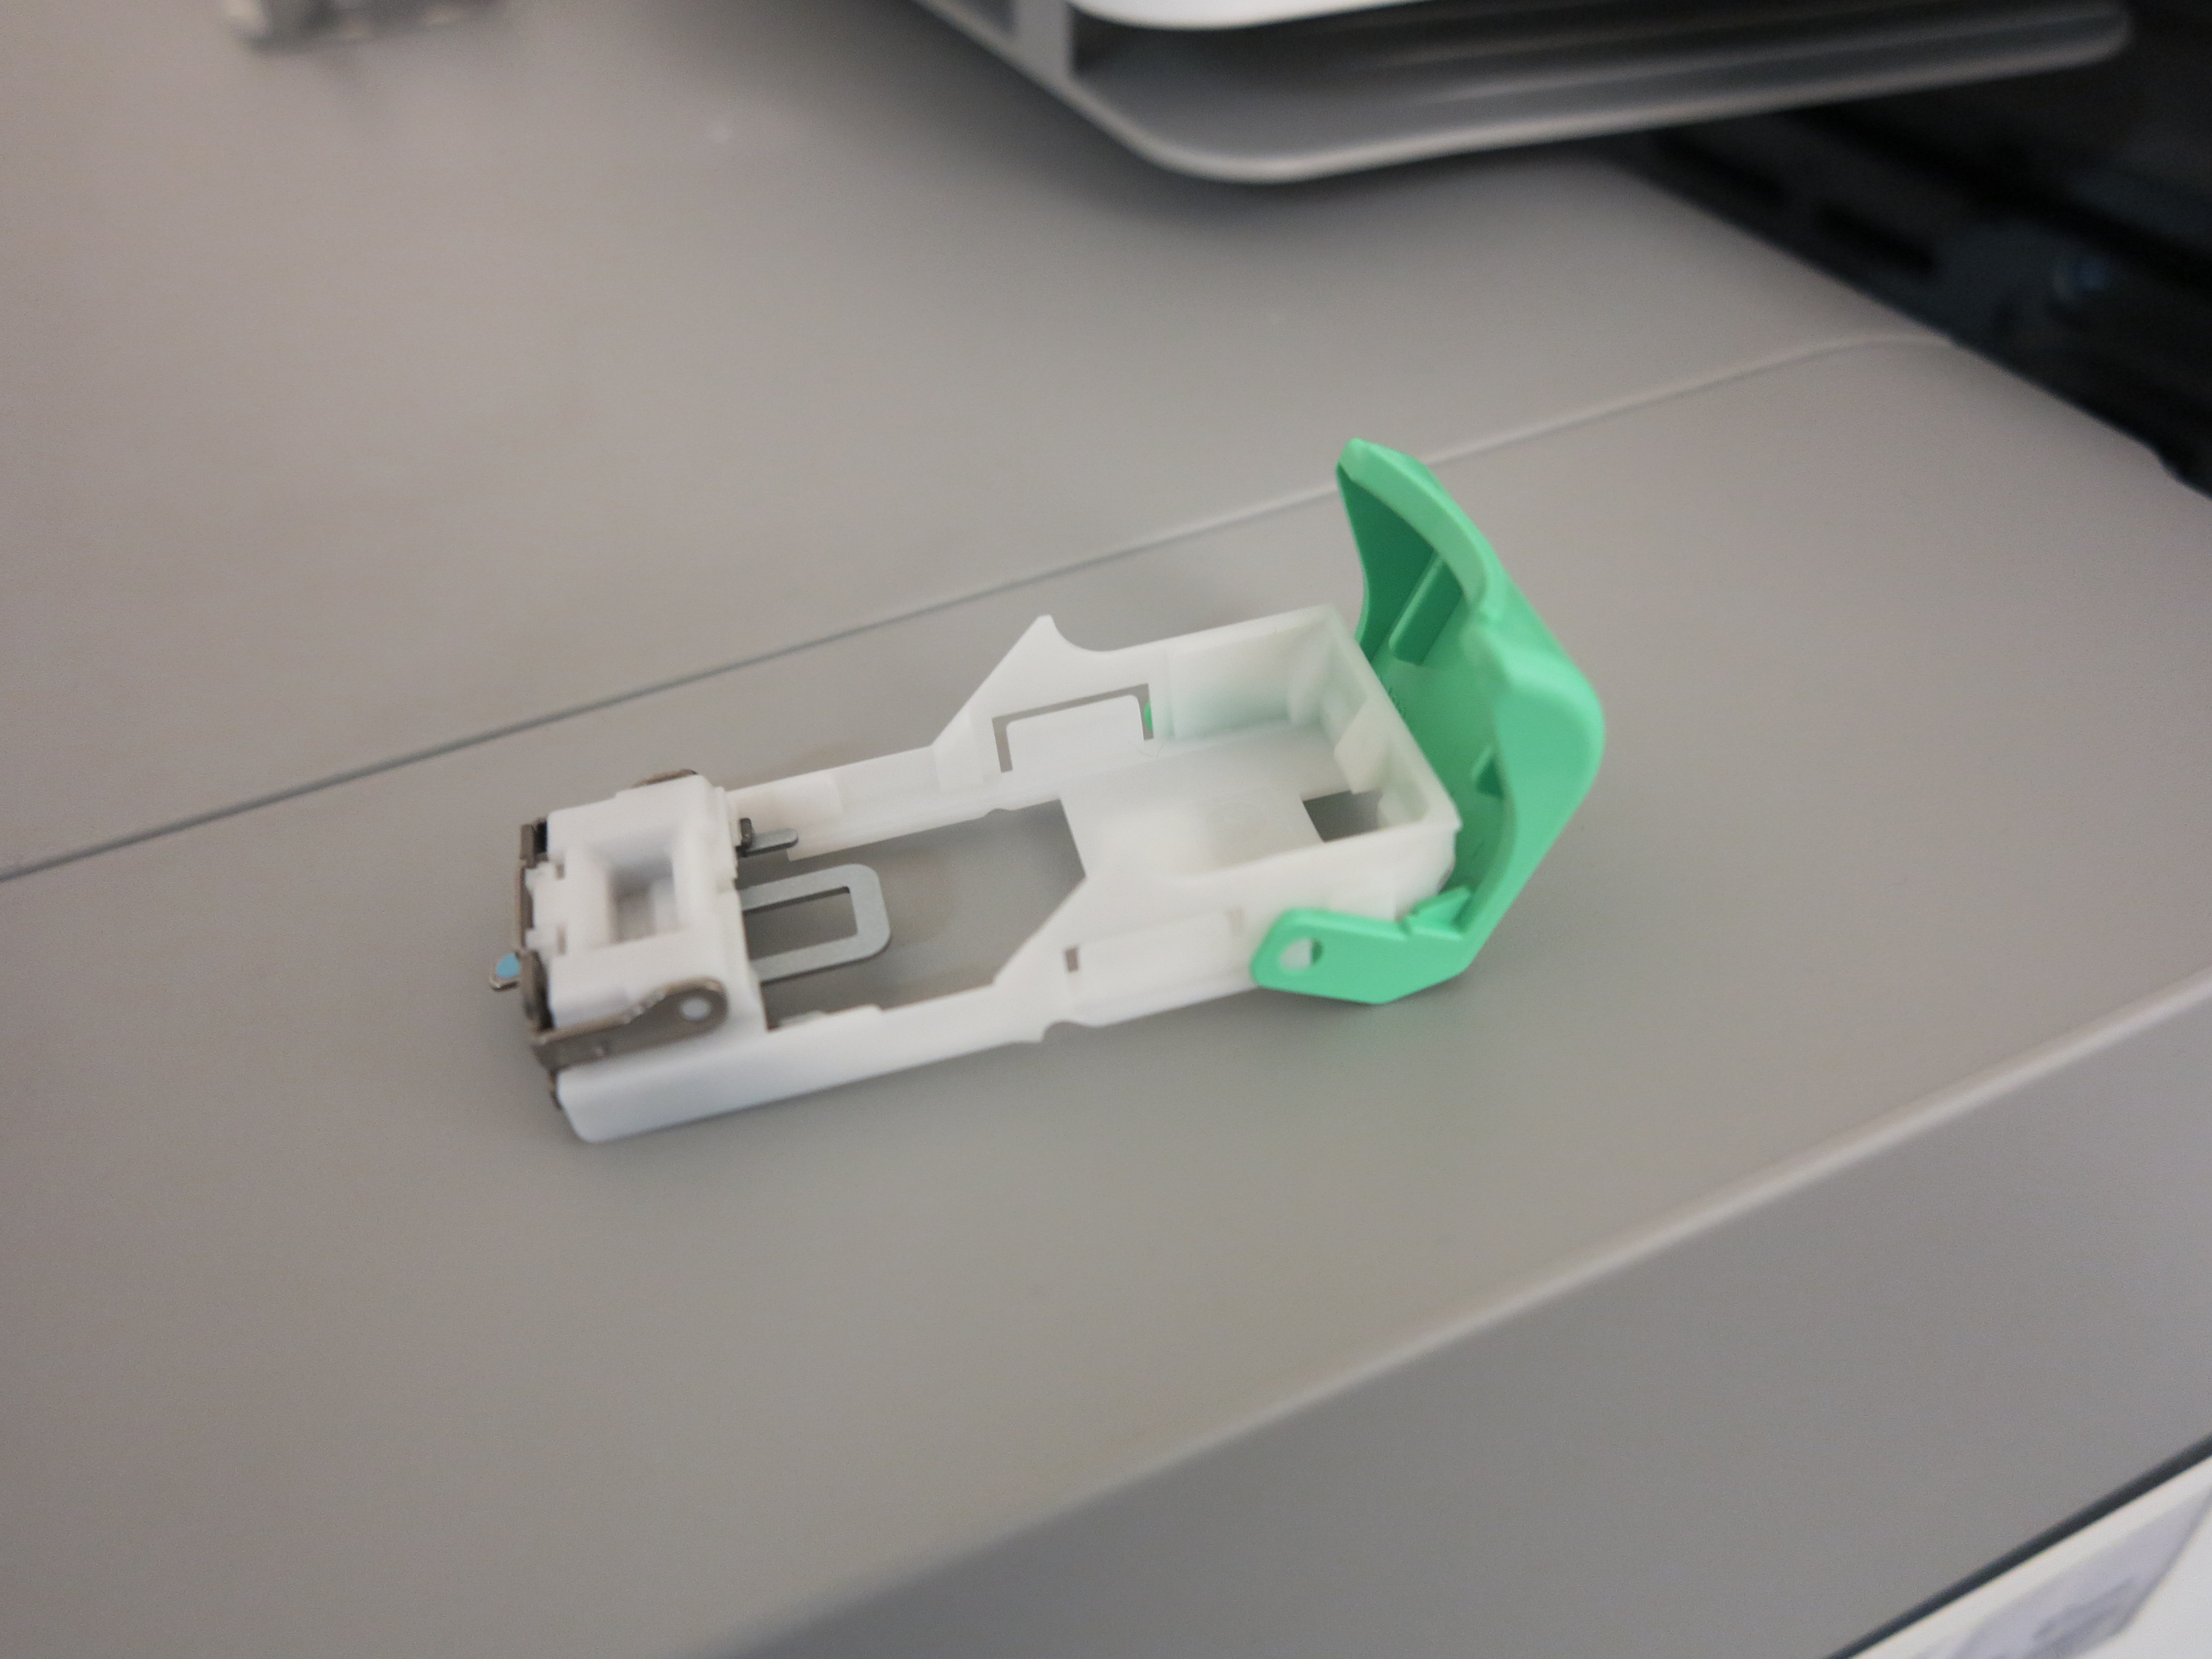
The new staple tray can now be inserted back by pushing it back into the slot. Then push the green piece back into its previous position which will lock the tray.


Now the compartment can be closed again. Check the printer screen to see if the staples have been changed successfully. If there is a warning, something went wrong, otherwise everything should be fine.
